How to teach an online lesson with Zoom
The Zoom platform is gaining popularity. One of the reasons is the ability to conduct various activities in a comfortable environment. But during their preparation, the organizers may have a question: «How to teach an online lesson with Zoom?». They should worry in advance, because otherwise there may be many problems that cannot be solved on the go. Let’s deal with everything in a detailed format.
Manual
The whole process can be divided into several global stages:
- Program installation.
- Creating an account.
- Setting up sound, microphone, and webcam.
- Launching a test meeting for verification.
- Launching the main meeting, inviting participants.
We’ll look at each of them in more detail. And at the end of the article, we will mention the features that Zoom offers for online learning.
Directly installation
It is most convenient to use a computer program that is released for Windows, Mac OS, and Linux because in this case, the organizer will have access to all the functions of Zoom. But there is also an option with a mobile application.
Actual instructions:
Pay attention only to the installation procedure for the required platform.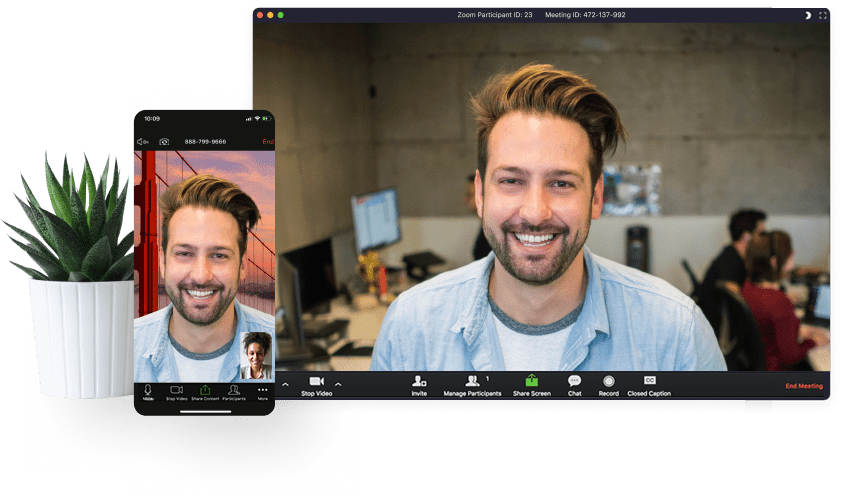
Signing up
You can connect to a conference without an account, but to organize it, you definitely need to create an account. The service is completely free but somewhat confusing, so we have explained instructions in a separate article.
Setting up
It is very important that you can hear and see the students perfectly, and they can see and hear you. Any problems with sound will greatly complicate communication, and in the worst case, make it impossible, thereby disrupting the lesson. So the program should be configured in advance (this does not apply to the mobile application). Let’s analyze this process step by step:
- Open the Zoom window.
- Go to the «Home» tab if it is not displayed.
- Click on the marked buttons:
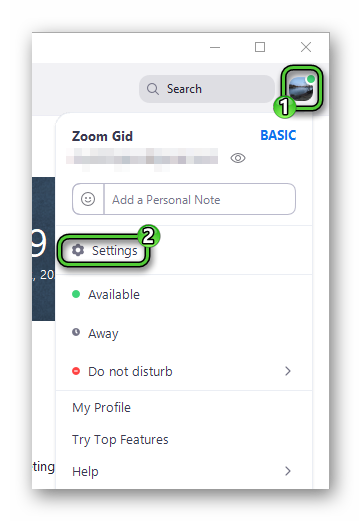
- In the left menu, click on the «Video» tab. If you don’t have a webcam, then skip this step.
- In the «Camera» item, select a working webcam. As a result, a picture from it should appear in the window above.
- Adjust the aspect ratio – 16:9 or «Original ratio».
- Rotate the image and adjust the mirror mode if necessary.
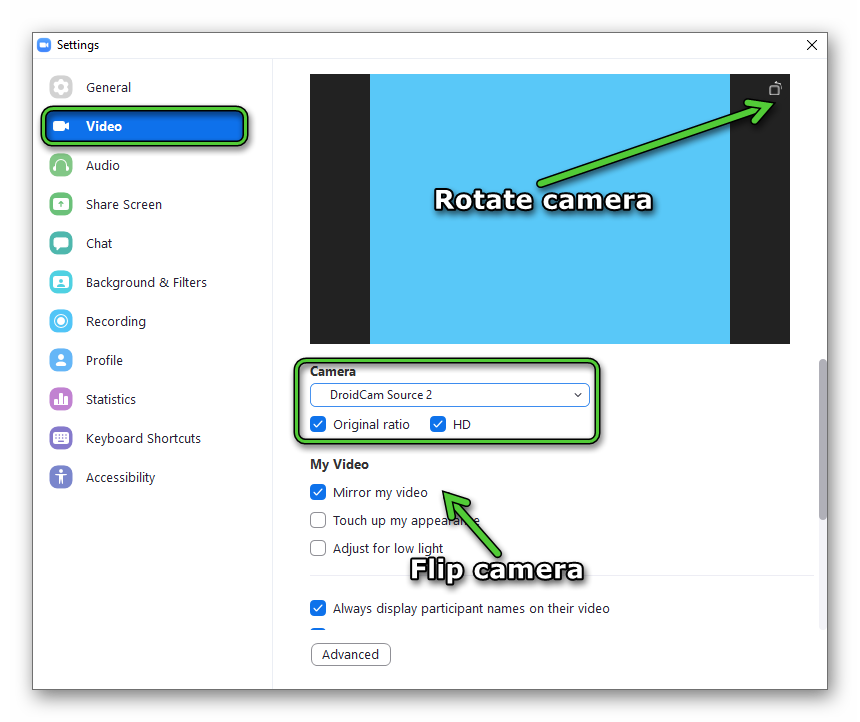
- The option «HD» is needed to improve the picture quality. It is worth activating it only if you have a fast Internet connection.
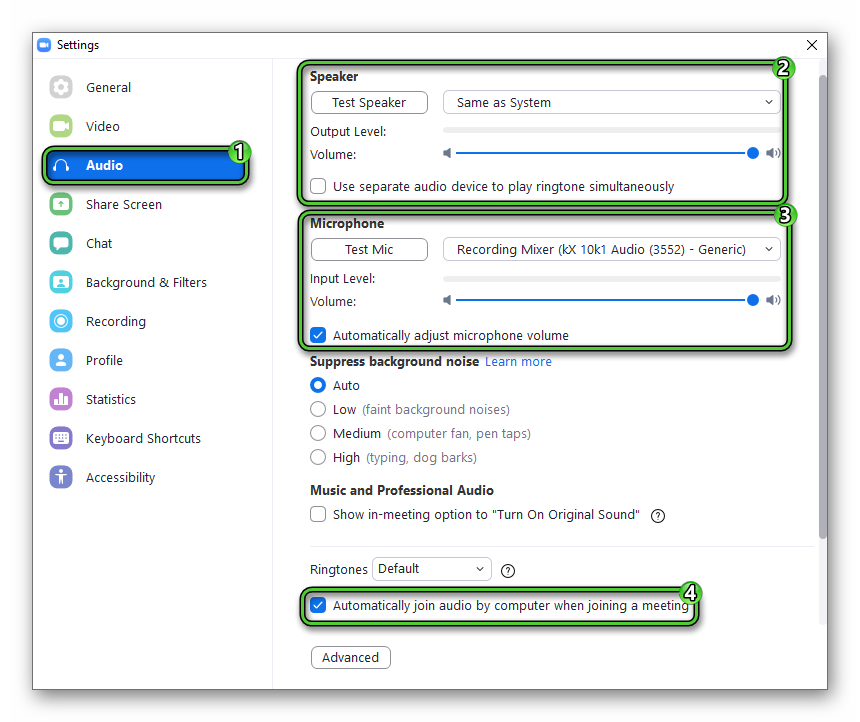
- Now go to the «Audio» tab.
- In the item «Speaker» select your speakers or headphones. Click on the «Test…» button to check everything.
- Configure «Microphone» in the same way.
- Adjust the volume levels.
- Enable the «Automatically join…» option.
- Close the settings page.
The «Virtual Background» function will be very useful in some cases. Its essence is to replace the background from your camera with any image or video. Detailed information is in this material.
Test meeting
Now is the time to make sure you set everything up correctly. The best way is to start a test online meeting. First of all, it is needed to check audio and video. The method of its implementation is described here.
Useful functions
Before moving on to the final part of the article, it is worth describing the various functions that will help in conducting an online lesson. The most useful are four of them:
- Screen sharing with mouse and keyboard control
- Sharing sound
- Drawing
- Recording
Inviting participants
The preparatory steps have already been completed, so it’s time to start the main meeting and add participants to it. Detailed instructions are here.


